Many ordinary users who don’t have any programming experience usually have challenges updating their own sites immediately after their web developers hand over the site to the site owner. Usually, they go running back to the web developer over and over for a quick recap on what the developer already described the process step by step.
Most wordpress websites have different techniques of updating different pages or even posts for a blogging site. For that reason I will show the general steps from logging in to adding, editing data in a page or post in a website.
Admin Login Page
First, lets get started with the simple step of all. Getting into the admin area of your website;
The general method is adding /wp-admin url to your domain i.e
http://domain-name/wp-admin
This will direct you to a login screen where you will login using your administrative credentials given by your web developer.

Navigating to Pages
On logging in you will be directed to what we call the dashboard. It will have lots of menu on the left panel as shown on the image below;

Updating Information on site pages
Congratulations on reaching up to this point. Now we move on. On the left side of the menu, click on the menu with Pages as shown below:
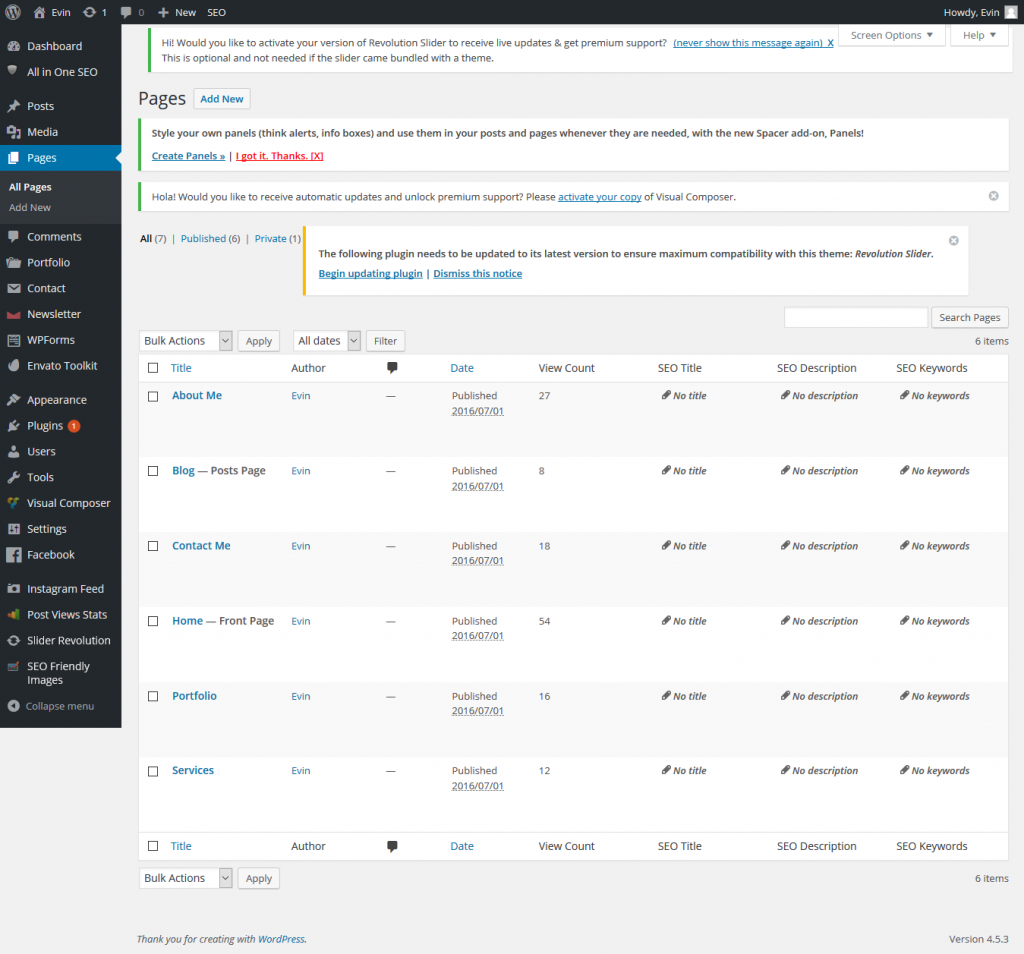
kindly as precaution you should not touch any other menu apart from pages and posts if you have a blog done for you or else you may spoil the design and end up paying your developer again to correct the mess you accidentally made.
Click on the page you want to edit. On after editing, DO NOT press the update button before previewing the changes you made. To preview, Press the grey Preview Changes button and the page will open on a new tab;
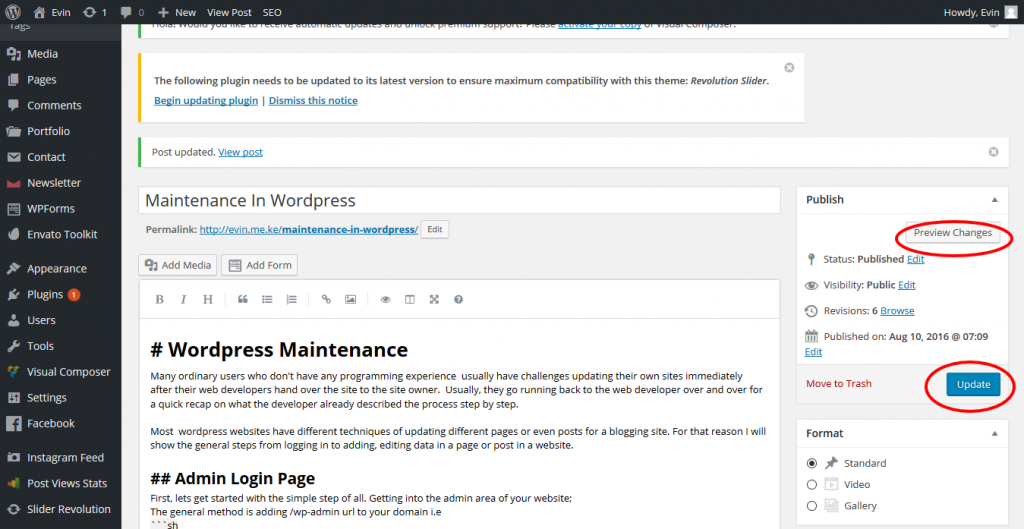
Once you are okay with the changes, then you can update the page.
Note : WordPress has no undo button so be sure when updating your pages.
See it wasn’t hard!
Navigating to Posts
This step applies only to those that have blogs set up in their websites. Here, navigate to posts;
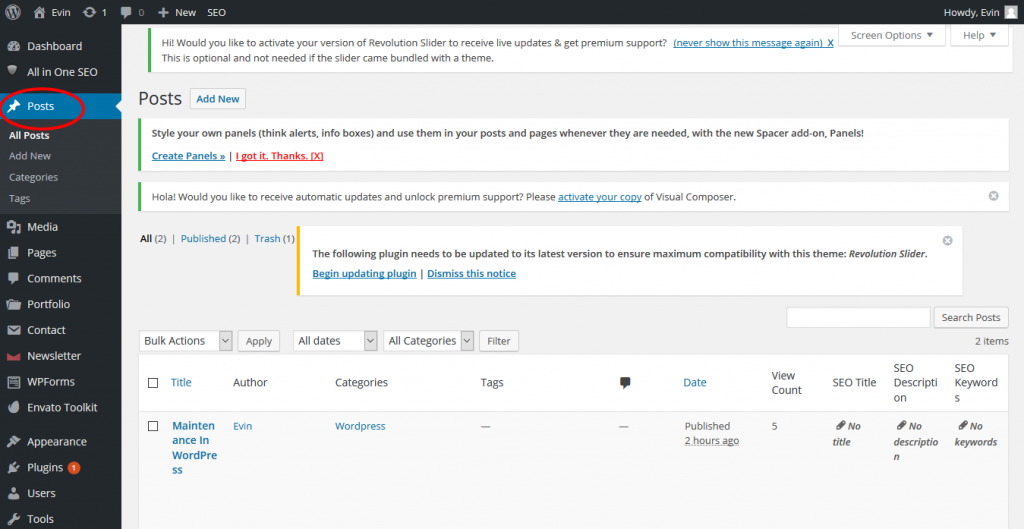
A list of posts will appear if you initially had published a few. If not, a sample post will be present. If you wish to create a new post, press the Add New button at the top.
Let me just explain different parts of the post page:
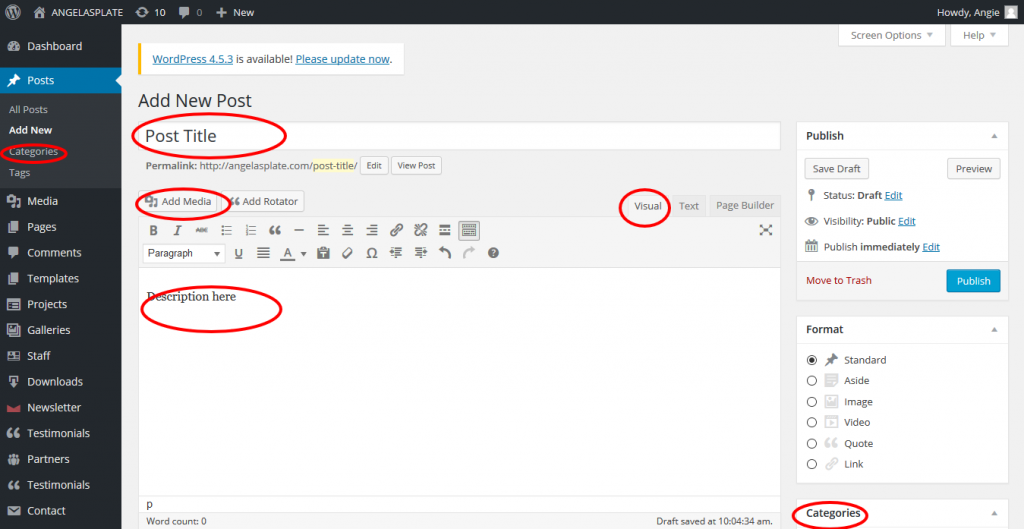
- Categories – Placed on the left side of the menu under Posts . Here is where you create categories in your blog. For instance, if you have a cooking blog, you can create categories like breakfast, lunch, dinner foods.
-Another categories located on the bottom right corner is for selecting a category on which this particular post belongs to. However, you can choose multiple categories for a post and it will appear on all chosen categories. - Title – An input located just below the Add New Post label. It is here that the title of the post is named by the user. Example, If you are blogging about cooking rice and meat, you can say Rice + Meat Recipe
- Add Media – A button that is used to add an image to your post while publishing on the Description here location as shown on the image above, red circled.
- Visual – The visual circled is where a normal user types in the post. The Text part is for your web developer. That is where the ugly staff are coded for the normal user. 🙂
More advanced sites having complex functionalities like booking may have their own menu for that so this may not apply in their case
How easy and fun it was! 🙂 If you liked this article please share and subscribe to get more tips.

